How to Choose the Right Mounting Magnets for Your Needs?
How to Choose the Right Mounting Magnets for Your Needs?
Mounting magnets fail when chosen wrong. Loose fixtures damage property and waste money. The correct magnet type holds securely based on weight, surface, and environment.
Choose mounting magnets by calculating required pull force (add 30% safety margin), matching base material (steel/concrete/wood), and considering environmental factors (moisture/temperature). Industrial applications often need N52 neodymium magnets, while temporary mounts work with ceramic magnets.
Keep reading to understand how to select mounting magnets that fit your needs.
Table of Contents
What is a mounting magnet?
Choosing the wrong mounting magnets leads to weak holds, damage, or safety issues. Knowing what a mounting magnet is helps avoid these problems.
A mounting magnet is a magnet created to fix or hold objects firmly, often with a specific design for easy attachment or installation in various settings. These magnets provide reliable grip and are used widely across commercial and DIY projects.
Mounting magnets come in many materials and shapes. Neodymium types are common due to their strong magnetic power and compact design, ideal for demanding mounting tasks. They often feature coatings like nickel or epoxy to resist corrosion, extending lifespan in tough environments.
Selecting mounting magnets involves balancing magnetic strength against size and surface required. Too weak a magnet fails to hold, while too strong can make handling difficult or risk damage.
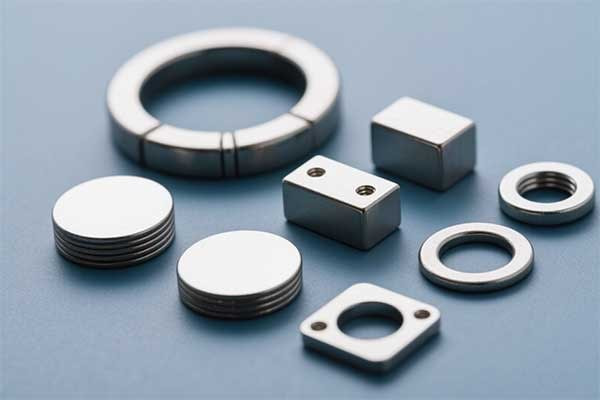
Common Types of Mounting Magnets
| Type | Material | Typical Use | Strength |
|---|---|---|---|
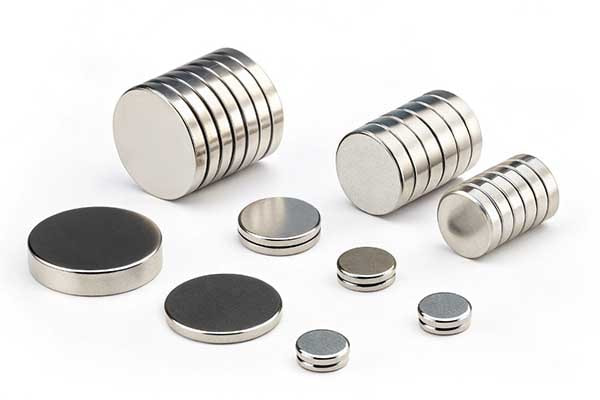
| Disc Magnets | Neodymium, Ceramic | Fixtures, mounting small parts | High |
| Ring Magnets | Neodymium | Rotating parts, sensor mounts | Medium to High |
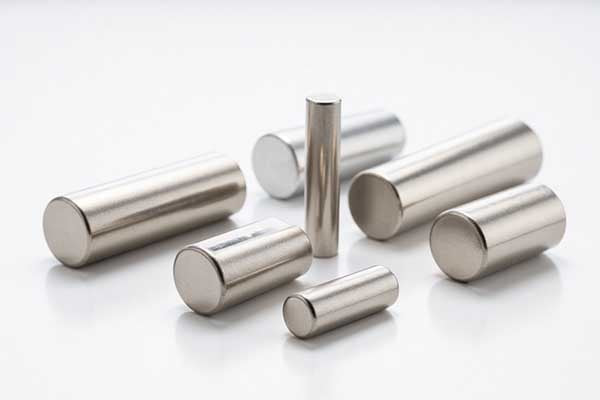
| Block Magnets | Neodymium, Ferrite | Heavy-duty mounting, industrial use | Very High |
Mounting magnets like disc magnets are essential in many commercial setups due to their compact size and strong hold. M-Magnet Company specializes in these magnets, delivering quality products designed for diverse mounting applications.
What Factors Determine Magnet Mounting Strength?
Mounting magnet strength depends on:
-
1) Magnet grade (N35-N55)
-
2) Contact surface area
-
3) Base material thickness
-
4) Environmental conditions
-
5) Force direction (shear/pull)
A 50mm N52 disc magnet holds 120kg on 10mm steel but only 20kg on 2mm sheet metal.
Besides size and strength, coatings affect durability. Nickel plating is the standard for corrosion resistance, but epoxy coatings provide better chemical resistance. Matching these properties with the environment ensures longer magnet life.
Mounting magnets must also be chosen with the mounting surface in mind. Ferromagnetic surfaces improve hold, while non-magnetic surfaces require adhesive backing or mechanical fixtures.
The Science Behind Magnetic Mounting
Mounting magnets work through magnetic flux concentration. Thicker ferromagnetic materials complete more flux lines, increasing hold. Our tests show:
| Steel Thickness | 50mm N52 Holding Power | Flux Completion |
|---|---|---|
| 2mm | 20kg | 35% |
| 5mm | 65kg | 72% |
| 10mm | 120kg | 98% |
What Are the Different Types of Mounting Magnets?
Mount magnet selection can be confusing. Too many options often make people feel unsure and waste time. But choosing the right one is easier when you know the categories.
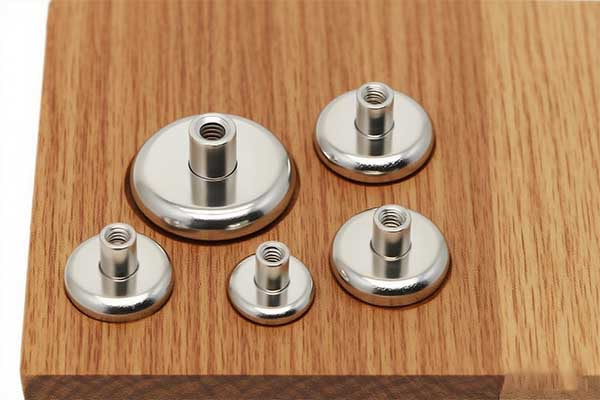
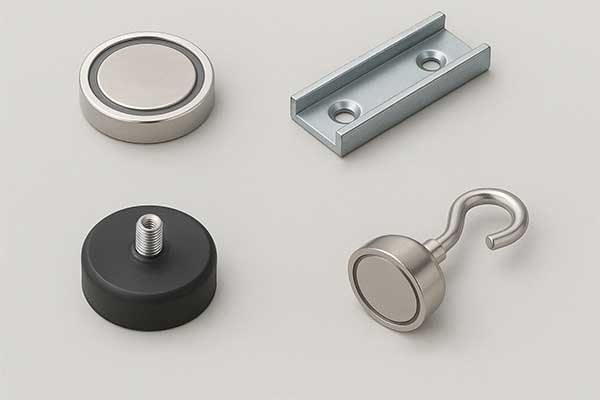
Mounting magnets come in several forms, including pot magnets, channel magnets, rubber-coated magnets, and hook magnets. Each type serves specific purposes based on shape, strength, and use environment.
Mount magnets play a crucial role across many industries. They differ by shape, structure, and protective coatings. Understanding the types can help you choose the best fit. Some types focus on holding strength, others on surface safety or flexibility.
Main Types of Mounting Magnets
| Type | Main Feature | Typical Use |
|---|---|---|
| Pot Magnet | Strong hold with steel shell | Industrial mounting, machinery |
| Channel Magnet | Flat with elongated pull | Sign mounting, shelving |
| Rubber-Coated Magnet | Surface protection and water resistance | Vehicle mounts, outdoor use |
| Hook/Eyebolt Magnet | Hanging capability | Temporary installations, lights |
Mount magnet selection depends on usage scene. Pot magnets are durable and compact. Channel magnets are perfect when slimness matters. Rubber-coated ones protect sensitive surfaces like painted metal. Hook and eyebolt magnets add versatility. Each category addresses different holding, mobility, and surface care needs.
Neodymium disc magnets are often embedded in these mount types. In fact, many users do not realize the core strength comes from neodymium disc magnets sealed within steel pots or housings. This design enhances pull force and improves directional control. At M-Magnet, we use these principles to offer customized mounting solutions across automotive, industrial, and signage markets.
What Materials Work Best with Mounting Magnets?
When magnets slip or fall, the problem usually lies in the surface. Choosing the wrong material wastes your effort and reduces safety. To stop this, know which materials work best.
Mounting magnets work best on flat, ferromagnetic materials like steel and iron. Surfaces must be clean, smooth, and thick enough to support the magnetic pull.
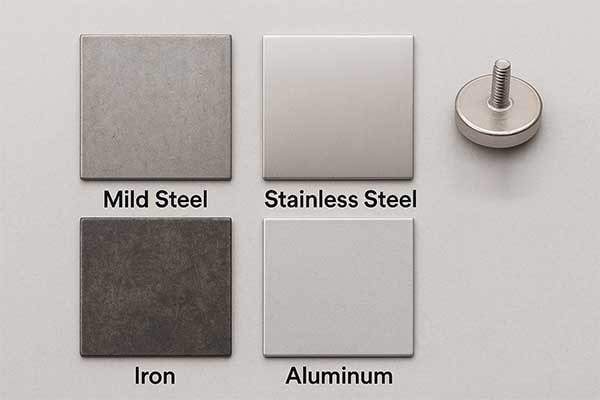
Mount magnets rely on surface compatibility. The magnetic force is not absolute — it changes based on the contact area and the metal type. Not every metal works well with magnets. Aluminum, copper, and some stainless steels block or weaken magnetic pull. Magnet strength also changes with paint, dirt, and gaps between surfaces.
Material Compatibility for Mount Magnets
| Material | Magnet Compatibility | Comment |
|---|---|---|
| Mild Steel | Excellent | Maximum holding power |
| Stainless Steel (304) | Poor | Non-magnetic alloy |
| Iron | Good | Stable grip |
| Aluminum | None | Not magnetic |
When selecting mount magnets, test them on the actual surface. If the area is painted or curved, performance drops. Neodymium disc magnets used in mount magnet assemblies work best when the contact is direct, flat, and ferromagnetic. If that’s not possible, custom mounting setups from M-Magnet can help compensate for material or shape issues. We often design magnet mounts with flexible coatings or adapters to match rough or coated surfaces.
Also, don’t forget thickness. Thin metal sheets limit holding force. Magnets draw strength from the amount of ferrous material they can attract. A 1mm steel sheet supports much less weight than a 5mm plate. This detail matters when using mount magnets for heavy tools, industrial sensors, or removable displays. Choosing the correct material increases safety and improves stability. Always match the magnet with the right surface.
What Are the Best Techniques for Mounting Magnets?
Mounting magnets securely is crucial for any project, whether it's holding tools or creating magnetic closures. Choosing the wrong method can lead to frustration and safety issues. Learn the best techniques to ensure your magnets stay in place.
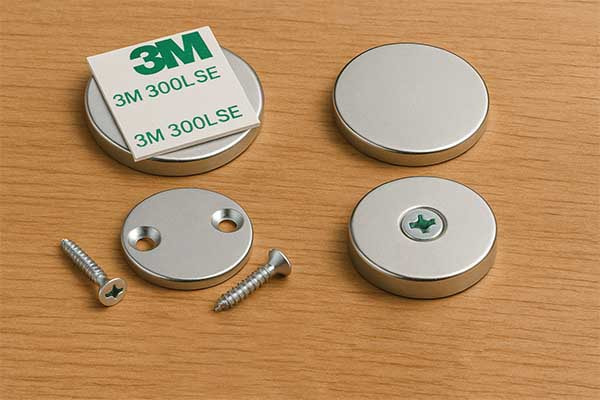
The best techniques for mounting mountable magnets include using adhesive-backed magnets for quick application, gluing magnets with strong adhesives like epoxy after surface preparation, and using mechanical fasteners like screws for magnets with countersunk holes. Each method suits different project needs.
Exploring Mounting Techniques
Mounting mountable magnets effectively requires understanding the available methods. Each technique has unique strengths and weaknesses, making it suitable for specific applications. At M-Magnet Company, we provide a variety of neodymium magnets to meet diverse project requirements. Here’s a detailed look at the three primary techniques.
Adhesive-Backed Magnets
Adhesive-backed magnets come with a pre-applied adhesive layer. They are easy to use and require no additional tools. You simply peel off the backing and stick the magnet to a clean surface. These magnets work well for light-duty tasks, such as attaching notes or small tools to a metal surface. However, their bond strength is limited, especially on rough or porous surfaces. Over time, the adhesive may weaken, particularly in humid or outdoor environments. This method is best for temporary setups or lightweight applications.
Gluing Magnets
Gluing magnets involves using adhesives like epoxy, super glue, or hot glue to secure them to surfaces. This method offers a strong, permanent bond, ideal for heavy-duty projects like tool holders or magnetic closures. Proper surface preparation is critical. Clean the magnet with rubbing alcohol to remove oils, and lightly sand nickel-coated magnets for better adhesion. The surface material matters too—wood, metal, and plastic require different adhesives. For example, epoxy works well for most surfaces, but super glue is faster for smaller magnets. The downside is the need for curing time, which can range from minutes to hours. Removing glued magnets can also damage the surface, so plan carefully.
Mechanical Fastening
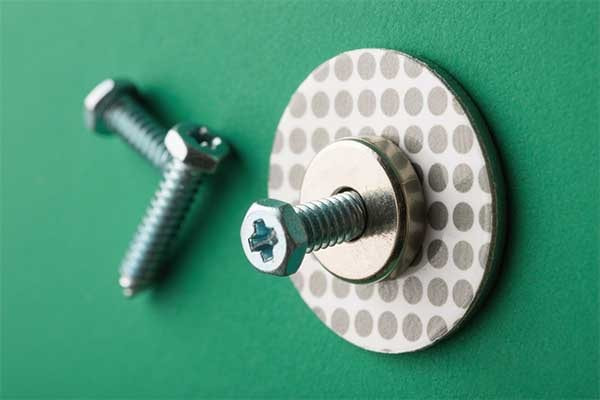
Mechanical fastening uses magnets with pre-drilled or countersunk holes, allowing them to be screwed into place. This method provides the strongest and most adjustable hold, perfect for industrial applications or projects requiring precise placement, like mounting signs or fixtures. No adhesive is needed, which simplifies the process and allows for easy removal or repositioning. However, drilling into the surface is required, which may not suit all materials or aesthetic preferences. This technique is ideal when durability and flexibility are priorities.
Choosing the Right Technique
Selecting the best method depends on your project’s needs. Consider the weight of the object, the surface material, and whether you need a permanent or removable solution. For instance, adhesive-backed magnets are great for quick, temporary setups, while gluing or mechanical fastening suits heavier, long-term applications.
The table below compares these techniques to guide your decision.
| Technique | Ease of Application | Strength of Bond | Best For |
|---|---|---|---|
| Adhesive-Backed | Very Easy | Low to Medium | Light-duty, temporary |
| Gluing | Moderate | High | Heavy-duty, permanent |
| Mechanical Fastening | Moderate to Difficult | Very High | Adjustable, industrial |
Practical Considerations
Safety is a key factor when working with neodymium magnets. Their strong magnetic fields can cause pinching injuries or damage electronics. Always handle them carefully and store them away from devices. Additionally, consider the environment. Outdoor projects may require weather-resistant adhesives or coatings to prevent corrosion. For heavy objects, mechanical fastening or high-strength epoxy is often the safest choice. By weighing these factors, you can ensure your project is both functional and durable.
How to Attach Magnets to Wood?
Attaching magnets to wood can enhance your DIY projects, from creating magnetic closures to organizing tools. Doing it wrong risks weak bonds or damaged projects. Learn the best methods to secure magnets effectively.
To attach mountable magnets to wood, drill a recess slightly deeper than the magnet, clean surfaces, and use strong adhesives like epoxy or super glue. For removable options, use adhesive-backed magnets or mechanical fasteners for magnets with holes.
Step-by-Step Guide to Attaching Magnets to Wood
Attaching mountable magnets to wood is a popular technique in woodworking and DIY projects. Whether you’re building a magnetic knife strip, a tool organizer, or a hidden compartment, securing magnets properly ensures durability and functionality. At M-Magnet Company, we supply high-quality neodymium magnets ideal for these applications. Here’s a detailed guide to help you attach magnets to wood effectively.
Step 1: Choose the Right Magnet
Select neodymium magnets for their superior strength. These magnets come in various shapes, such as discs or blocks, and sizes to match your project’s needs. For example, a small disc magnet works well for a box closure, while a larger one suits a tool holder. Ensure the magnet has a protective coating, like nickel, to prevent corrosion, especially in humid environments. Choosing the right size and strength is critical to avoid overpowering or underperforming in your application.
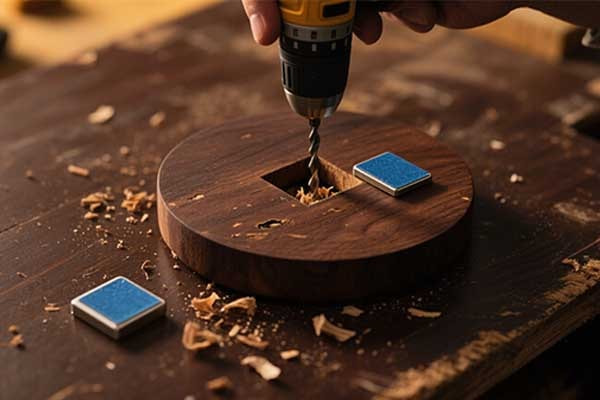
Step 2: Prepare the Wood Surface
Mark the exact spots where you’ll place the magnets. Use a forstner bit or a drill bit slightly larger than the magnet’s diameter to create a recess. The hole should be slightly deeper than the magnet’s thickness to ensure it sits flush with the wood surface. This prevents the magnet from protruding and maintains a clean look. After drilling, remove all wood dust from the hole using a brush or compressed air to ensure a strong bond.
Step 3: Prepare the Magnet
Clean the magnet with rubbing alcohol to remove oils or residues that could weaken the adhesive bond. If the magnet has a smooth nickel coating, lightly sand the side to be glued with fine-grit sandpaper (e.g., 120-grit). This creates a rougher surface for better adhesion. Be cautious not to damage the magnet’s coating, as this could lead to corrosion. Proper preparation is essential for a lasting bond.
Step 4: Apply Adhesive
Choose a strong adhesive suited for bonding metal to wood. Epoxy is a top choice due to its durability and strength, ideal for heavy-duty applications. Cyanoacrylate (super glue) works well for smaller magnets and faster setting times. Apply a small amount of adhesive to the magnet’s bottom or into the wood recess. Place the magnet in the hole, ensuring it’s level and flush with the surface. Press gently to secure it in place.
Step 5: Let It Cure
Follow the adhesive’s curing instructions. Epoxy typically requires several hours to fully set, while super glue can set in minutes. Avoid moving or stressing the magnet during this time to ensure a strong bond. For epoxy, I’ve found that clamping the magnet lightly (if possible) helps maintain alignment while curing. Patience here prevents future issues like magnets popping out.
Step 6: Test the Bond
Once the adhesive has cured, test the magnet by gently trying to pull it out. It should feel secure. If it’s part of a closure system, test it with the corresponding magnet or metal piece to confirm it holds as expected. If the bond is weak, you may need to reapply adhesive or check for surface preparation errors.
Alternative Methods
For projects requiring removable magnets, consider adhesive-backed magnets or those with countersunk holes for screwing into place. Adhesive-backed magnets are simpler but less durable for heavy loads. Magnets with holes allow for mechanical fastening, which is great for adjustable setups but requires drilling into the wood, potentially affecting aesthetics.
The table below outlines the key steps for gluing magnets to wood.
| Step | Description |
|---|---|
| 1. Choose Magnet | Select neodymium magnet, appropriate size and coating |
| 2. Prepare Wood | Drill recess, clean hole |
| 3. Prepare Magnet | Clean with alcohol, sand lightly |
| 4. Apply Adhesive | Use epoxy or super glue, place magnet |
| 5. Cure | Wait for adhesive to set |
| 6. Test | Check bond strength |
Practical Tips and Considerations
When attaching magnets to wood, consider the wood type and finish. Hardwoods like oak or maple provide a stable base, but softwoods like pine may require extra care to avoid splitting. If the wood is varnished, lightly sand the recess to improve adhesion. Safety is also important—neodymium magnets are powerful and can pinch fingers or attract unwanted metal objects. Store them safely and test their strength before finalizing your design. At M-Magnet Company, our neodymium mountable magnets are designed for durability and versatility, making them perfect for woodworking projects.
How Can I Improve Magnet Mounting Stability?
Struggling with unstable magnet mounts? Do your magnets slip or fail to hold? Discover practical ways to boost mounting stability and ensure your projects stay secure.
To improve magnet mounting stability, use stronger magnets, ensure clean and flat mounting surfaces, and consider mechanical fasteners alongside adhesive. Employing counterbores or proper encasement also enhances security. Matching the magnet's pull force to the load is crucial for reliable adhesion, preventing movement or detachment.
Improving magnet mounting stability requires a thoughtful approach, combining the right magnet with suitable installation techniques. It is not enough to just pick any magnet. You must consider the specific application, the weight of the item being mounted, and the environment.
Stronger magnets provide more holding power. However, even the strongest magnets, like those made from neodymium, can fail if the mounting surface is not prepared correctly. A clean, flat, and non-porous surface allows for maximum contact between the magnet and the mounted object. This direct contact is vital for the magnet's full potential to be realized.
Sometimes, relying solely on magnetic force is not enough, especially for heavy loads or in situations with vibrations. In such cases, combining magnets with mechanical fasteners offers increased security. Screws, bolts, or clips can complement the magnetic hold. This dual approach provides both quick attachment and a solid, long-term mount.
For example, recessed magnets, where the magnet sits within a cavity, offer a cleaner look and prevent lateral movement. This method is common for mounting panels or signs.
We often advise on the best methods for integrating magnets into various designs, ensuring maximum stability. Our solutions for mounting are used in many applications across America, Europe, and customers around the world.
Furthermore, environmental factors play a big role. Temperature fluctuations, humidity, and exposure to certain chemicals can affect a magnet's performance and the integrity of the adhesive or mounting material.
For outdoor applications or in industrial settings, it's crucial to select magnets and mounting hardware that can withstand these conditions. Proper encasement or protective coatings can shield the magnets from damage and corrosion, extending their lifespan and maintaining their holding strength.
This is especially important for permanent installations where replacement is difficult. We ensure our magnets for mounting are designed for durability.
Advanced Mounting Techniques and Considerations
| Factor | Impact on Stability | Improvement Method |
|---|---|---|
| Surface Cleanliness | Reduces direct contact, lowers pull force. | Clean and degrease surfaces thoroughly. |
| Magnet Strength | Insufficient strength leads to slippage. | Use higher grade magnets (e.g., N52 neodymium). |
| Mounting Method | Poor methods cause detachment. | Combine with screws, counterbores, or channels. |
| Environmental Factors | Corrosion, demagnetization from heat. | Apply coatings, select temperature-resistant magnets. |
When designing with magnets for mounting, it's also critical to consider the type of force being applied.
Is it a shear force, where the magnet slides parallel to the surface, or a pull force, where it lifts directly away? Magnets typically perform better under pull force.
If shear force is expected, additional mechanical support becomes even more critical. For instance, in applications like tool holders, strong magnets are used. However, their long-term stability benefits from the tools resting in a way that minimizes sideways strain on the magnet.
M-Magnet Company offers magnet customized solutions to address these specific challenges, ensuring that our magnets for mounting provide the stability and reliability our customers expect for their DIY projects and industrial needs.
Conclusion
Mounting magnets secure objects firmly and come in various shapes like discs, blocks, and rings. Their strength, coating, and design influence performance in commercial and DIY projects. Choosing suitable mounting magnets, including quality disc magnets, ensures safety and durability. M-Magnet Company offers customized solutions to match any mounting need, providing reliable products for America and Europe.
About Blogger
Benjamin Li
Operation Manager of M-Magnet Company